Follow Me On Social Media!
The World’s Easiest Yeast Bread: A Beginner’s Guide to Artisan Baking
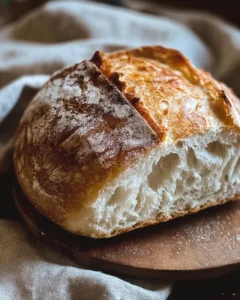
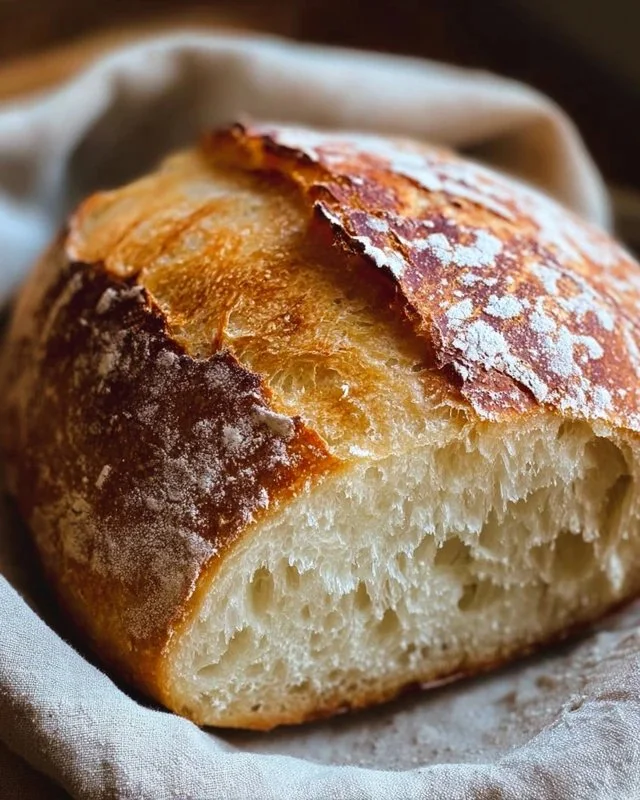
The aroma of freshly baked bread wafting through your home is one of life’s simple pleasures. I remember the first time I made this incredibly easy yeast bread—a crusty, golden loaf came out of the oven, filling my kitchen with warmth and comfort. It’s not just about the bread itself; it’s the whole experience that makes this recipe special. With minimal ingredients and straightforward steps, this is the perfect introduction to artisan baking, turning even novice bakers into confident breadmakers.
What Makes This Recipe Special
There are plenty of bread recipes out there, but what truly sets this one apart is its simplicity and technique. You don’t need fancy equipment—just a bowl, a wooden spoon, and a warm spot in your kitchen. It’s quick, budget-friendly, and a great option for weeknight dinners or lazy weekends. The fact that it requires minimal hands-on time means you can easily fit bread-making into a busy day.
“This bread changed my weekends! It’s effortless and tastes better than anything I could buy.” — Happy Baker
Whether you’re hosting a family brunch or looking to impress guests, this bread deserves a spot on your table. The crust is crunchy, while the inside is tender and chewy, making it a delightful base for sandwiches or simply enjoyed with butter.
Your Easy Cooking Guide
Making this loaf is a straightforward process. You’ll start by mixing your dry ingredients, then combine them with warm water. Once mixed, let the dough rise—this is where the magic happens. Patience is key, followed by a simple bake in a Dutch oven that yields amazing results. With just a few simple steps, you’ll have delicious homemade bread.
What You’ll Need
- 3 cups (450g) flour (bread or all-purpose)
- 2 tsp instant or rapid rise yeast
- 2 tsp kosher or cooking salt (avoid table salt)
- 1 1/2 cups (375 ml) very warm water (up to 55°C/130°F)
- 1 1/2 tbsp flour (for dusting)
Feel free to substitute the all-purpose flour with whole wheat flour or gluten-free alternatives if needed. Just keep in mind that this might change the texture!
Step-by-Step Directions
- In a large bowl, mix the flour, yeast, and salt.
- Pour in the warm water and stir with a wooden spoon until no dry flour remains. Expect a sticky, shaggy dough.
- Cover the bowl with cling wrap or a plate and allow the dough to rise at room temperature for 2–3 hours until it’s doubled in size, bubbly, and jiggly.
- (Optional) For an enhanced flavor, refrigerate the dough for up to 3 days.
- If refrigerated, let the dough rest on the counter for 45–60 minutes before baking.
- Preheat your oven to 230°C/450°F, while placing a Dutch oven inside for 30 minutes.
- Dust your work surface with 1 tbsp of flour and gently move the dough onto it. Sprinkle the top with 1/2 tbsp of flour.
- Using a dough scraper, fold the dough 6 times to shape it into a rough round.
- Place the dough onto parchment paper, seam-side down, and reshape gently if necessary.
- Carefully place the dough (with the parchment) into the preheated Dutch oven and cover it with the lid.
- Bake covered for 30 minutes, then uncover and bake for an additional 12 minutes until it’s deeply golden and crisp.
- Let it cool on a rack for 10 minutes before slicing.
Serving Suggestions
This easy yeast bread can be enjoyed in so many ways. Serve it warm with a dab of butter for a comforting treat. It’s also delicious sliced for sandwiches, topped with your favorite spreads, or served alongside soups and salads. Feel free to add herbs or cheese into the dough for extra flavor.
Best Way to Store The World’s Easiest Yeast Bread: A Beginner’s Guide to Artisan Baking
To keep your fresh bread delicious, store it at room temperature in an airtight container for up to three days. If you need to keep it longer, consider freezing the loaf. Just slice it beforehand, wrap it tightly in plastic wrap, and place it in a freezer bag. It can be thawed at room temperature or quickly toasted for that fresh-baked taste.
Pro Chef Tips
- Ensure your water is the right temperature to activate the yeast without killing it. Too hot? It could kill the yeast. Too cold? It won’t activate adequately.
- Letting it rest longer, especially if refrigerated, boosts flavor, giving your bread a richer texture and taste.
- When shaping the dough, don’t overwork it! A gentle touch creates a light, airy loaf.
Creative Twists
Experimenting with this recipe can enhance flavors. Try incorporating herbs like rosemary or thyme, add cheese for a savory loaf, or mix in nuts and dried fruits for a sweet variation. The possibilities are endless!
Common Questions
How long does it take to make this bread from start to finish?
From mixing ingredients to having fresh bread on your table, it takes about 2.5 to 3.5 hours, depending on your rising time and whether you decide to refrigerate the dough.
Can I use active dry yeast instead of instant yeast?
Yes, you can use active dry yeast; however, you will need to activate it in warm water first before adding it to your dry ingredients.
How can I make this recipe gluten-free?
You can substitute all-purpose flour with a gluten-free flour blend. Be sure to check that it has a binding agent, such as xanthan gum, to help with the texture.
Baking bread at home doesn’t have to be intimidating. With this straightforward recipe, you’ll be baking like a pro in no time!
Print
Easy Yeast Bread
- Total Time: 60 minutes
- Yield: 1 loaf 1x
- Diet: Vegetarian
Description
A simple recipe for crusty, homemade yeast bread that requires minimal ingredients and steps, perfect for novice bakers.
Ingredients
Scale
- 3 cups (450g) flour (bread or all-purpose)
- 2 tsp instant or rapid rise yeast
- 2 tsp kosher or cooking salt
- 1 1/2 cups (375 ml) very warm water (up to 55°C/130°F)
- 1 1/2 tbsp flour (for dusting)
Instructions
- In a large bowl, mix the flour, yeast, and salt.
- Pour in the warm water and stir with a wooden spoon until no dry flour remains; expect a sticky, shaggy dough.
- Cover the bowl with cling wrap or a plate and allow the dough to rise at room temperature for 2–3 hours until it’s doubled in size, bubbly, and jiggly.
- (Optional) For enhanced flavor, refrigerate the dough for up to 3 days.
- If refrigerated, let the dough rest on the counter for 45–60 minutes before baking.
- Preheat your oven to 230°C/450°F, placing a Dutch oven inside for 30 minutes.
- Dust your work surface with 1 tbsp of flour and gently move the dough onto it, sprinkling the top with 1/2 tbsp of flour.
- Using a dough scraper, fold the dough 6 times to shape it into a rough round.
- Place the dough onto parchment paper, seam-side down, and reshape gently if necessary.
- Carefully place the dough (with the parchment) into the preheated Dutch oven and cover it with the lid.
- Bake covered for 30 minutes, then uncover and bake for an additional 12 minutes until it’s deeply golden and crisp.
- Let it cool on a rack for 10 minutes before slicing.
Notes
Store the bread at room temperature in an airtight container for up to three days or freeze it for longer storage. Add herbs or cheese for extra flavor.
- Prep Time: 15 minutes
- Cook Time: 42 minutes
- Category: Baking
- Method: Baking
- Cuisine: Bread
Nutrition
- Serving Size: 1 serving
- Calories: 180
- Sugar: 0g
- Sodium: 400mg
- Fat: 1g
- Saturated Fat: 0g
- Unsaturated Fat: 1g
- Trans Fat: 0g
- Carbohydrates: 36g
- Fiber: 2g
- Protein: 6g
- Cholesterol: 0mg
Keywords: bread, yeast bread, homemade bread, artisan baking, novice baking