Follow Me On Social Media!
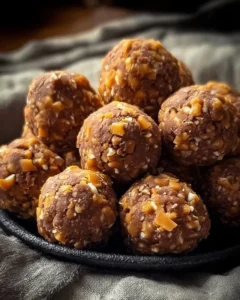
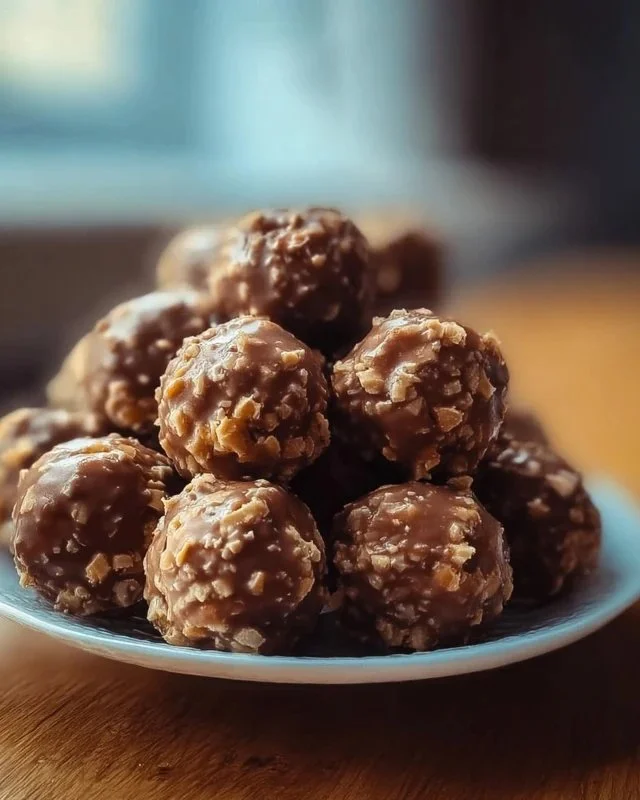
Butterfinger Bliss Balls
Butterfinger Bliss Balls Recipe: Your New Favorite Treat
Imagine sinking your teeth into a sweet and salty morsel, where the creamy richness of peanut butter meets the delightful crunch of graham crackers and Butterfinger candy. Butterfinger Bliss Balls are more than just delicious snacks; they’re a nostalgic treat that blends your favorite childhood candy bar with a simple, no-bake dessert that’s perfect for sharing. Whether you’re preparing for a holiday gathering or simply craving something sweet, these indulgent little bites are bound to impress.
Why This Recipe is Absolutely Irresistible
What makes Butterfinger Bliss Balls stand out is their simplicity and deliciousness. In just a few steps, you can create a sweet treat that’s not only kid-approved but also a hit among adults. The recipe requires minimal ingredients, making it budget-friendly and quick to whip up, perfect for spontaneous gatherings or after-school snacks.
"I brought these to a potluck, and they disappeared within minutes! Everyone wanted the recipe."
This treat is ideal for any occasion—whether you’re hosting a family brunch, celebrating a birthday, or just wanting to treat yourself after a long week. Their rich flavors and delightful textures ensure they quickly become the star of the dessert table!
Crafting Your Butterfinger Bliss Balls: A Simple Guide
Creating Butterfinger Bliss Balls is a straightforward and enjoyable process. Here’s what you can expect as you embark on this sweet adventure:
- Mix together the ingredients until everything is well combined.
- Form small balls and place them on a baking sheet.
- Chill to firm them up before dipping.
- Coat each ball in melted chocolate and refrigerate until set.
This recipe offers a window into a deliciously fun experience, allowing you to get your hands a bit messy and indulge in a classic candy bar reinvented.
Gather Your Ingredients
To make these delightful treats, you’ll need the following ingredients:
- 1 cup creamy peanut butter
- 1 cup crushed graham crackers
- 1 cup chopped Butterfinger candy bars
- 2 cups melted chocolate
If you’re looking for alternatives, consider using almond butter for a nutty twist or swapping out Butterfinger with your favorite chocolate bar.
Step-by-Step Directions for Butterfinger Bliss Balls
- In a mixing bowl, combine the creamy peanut butter, crushed graham crackers, and chopped Butterfinger bars until well blended.
- Roll the mixture into small balls and place them on a baking sheet.
- Refrigerate for about 30 minutes to firm up.
- Dip each ball in melted chocolate, ensuring they are completely coated.
- Place the chocolate-covered balls back on the baking sheet and refrigerate until the chocolate is set.
- Serve chilled and enjoy!
The Best Way to Serve Butterfinger Bliss Balls
When it comes to serving Butterfinger Bliss Balls, think about creativity! Present them on a beautiful serving platter dusted with crushed graham crackers or drizzle some extra melted chocolate over the top for a gourmet touch. These treats pair wonderfully with a glass of cold milk or a warm cup of coffee, providing a delightful contrast of flavors that will enhance the overall experience.
Keeping Your Butterfinger Bliss Balls Fresh Longer
For storage, simply place your bliss balls in an airtight container and keep them in the refrigerator. They’ll stay fresh for about a week, making them perfect for snacking throughout the week. If you want to keep them longer, consider freezing them in a sealed container. Just remember to allow them to thaw in the fridge before enjoying!
Pro Chef Tips for Perfecting Your Bliss Balls
- If the mixture feels too sticky, a bit more crushed graham crackers can make the rolling process easier.
- You can add a pinch of sea salt to the melted chocolate for that sweet-and-salty flavor explosion.
- For an added crunch, consider mixing in some chopped nuts or pretzels into the mixture.
Delicious Variations to Try
Feeling adventurous? Here are some creative twists you can incorporate:
- Nut-Free: Substitute creamy sunflower seed butter for a nut-free option.
- Chocolate Variations: Try using white chocolate for a different flavor profile.
- Flavor Infusions: Add a splash of vanilla extract or a pinch of cinnamon to the mixture for an aromatic twist.
Your Questions Answered About Butterfinger Bliss Balls
How long do these take to prepare?
These bliss balls can be made in about 20 minutes, not including chilling time!
Can I use other candy bars?
Absolutely! Feel free to substitute Butterfinger with any of your favorite chocolate bars, like Snickers or Twix.
What’s the best way to store leftovers?
Keep them in an airtight container in the fridge for about a week, or freeze them for up to 3 months.
Are these suitable for kids?
Yes! These are a fun, kid-friendly treat that your little ones will love to help make (and snack on)!
How can I customize the sweetness?
If you want to dial back the sweetness, reduce the amount of chocolate or use dark chocolate for a richer flavor.
With these Butterfinger Bliss Balls, you’re not just creating a dessert—you’re crafting moments filled with joy, laughter, and plenty of deliciousness. So preheat your fridge and get ready to impress your friends and family alike!
Print
Butterfinger Bliss Balls
- Total Time: 50 minutes
- Yield: 24 servings 1x
- Diet: Vegetarian
Description
Sweet and salty no-bake treats combining creamy peanut butter, crushed graham crackers, and Butterfinger candy, coated in chocolate.
Ingredients
Scale
- 1 cup creamy peanut butter
- 1 cup crushed graham crackers
- 1 cup chopped Butterfinger candy bars
- 2 cups melted chocolate
Instructions
- In a mixing bowl, combine the creamy peanut butter, crushed graham crackers, and chopped Butterfinger bars until well blended.
- Roll the mixture into small balls and place them on a baking sheet.
- Refrigerate for about 30 minutes to firm up.
- Dip each ball in melted chocolate, ensuring they are completely coated.
- Place the chocolate-covered balls back on the baking sheet and refrigerate until the chocolate is set.
- Serve chilled and enjoy!
Notes
For a nut-free option, use sunflower seed butter. Experiment with different chocolate types for variation.
- Prep Time: 20 minutes
- Cook Time: 0 minutes
- Category: Dessert
- Method: No-Bake
- Cuisine: American
Nutrition
- Serving Size: 1 ball
- Calories: 150
- Sugar: 12g
- Sodium: 100mg
- Fat: 7g
- Saturated Fat: 3g
- Unsaturated Fat: 4g
- Trans Fat: 0g
- Carbohydrates: 20g
- Fiber: 1g
- Protein: 3g
- Cholesterol: 0mg
Keywords: Butterfinger, bliss balls, no-bake dessert, easy treats, peanut butter snacks