Follow Me On Social Media!
Jellycat Birthday Cake
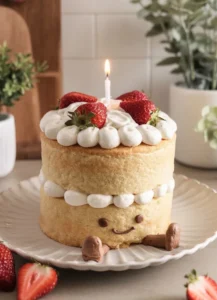
This Jellycat Birthday Cake is soft, light, and joyful. It looks cute, tastes delicate, and feels special without much effort. You bake two tender cake layers. You fill them with sweet strawberry jam and clouds of whipped cream. You finish with chocolate pieces, a dust of cocoa, and a bright birthday candle. The result is a playful party cake with simple, clean flavors.
You do not need fancy skills to make it. The batter comes together fast. The whipped cream filling is easy and light. The jam brings a bright, fruity pop. The fresh strawberries add a fresh bite and a pretty finish. The chocolate gives a little crunch and a hint of richness. It all balances well.
This cake fits many tastes. It works with dairy or non-dairy milk. You can use store-bought jam or your own jar. You can keep the look simple or make it more fun with extra touches. The result is a classic birthday centerpiece that feels homemade and comforting.
Why You Should Make This Jellycat Birthday Cake
- It is beginner-friendly. The steps are clear and simple. You whisk, fold, bake, whip, and assemble. No complex techniques or special equipment are required.
- The ingredients are basic. You likely have flour, sugar, eggs, milk, and butter at home. The cake also uses oil, which keeps it moist and soft for longer. The whipped cream uses powdered sugar and vanilla, which are pantry staples.
- It tastes light and fresh. The sponge is not heavy or overly sweet. The whipped cream adds a smooth, airy texture. Strawberry jam and fresh strawberries bring a bright, fruity note. A little dark chocolate balances the sweetness.
- It looks charming without hard work. This Jellycat Birthday Cake has soft layers, white cream, rosy jam, and pretty berry halves. A dust of cocoa and a few chocolate shards make it look polished. The striped birthday candle gives a festive touch.
- It adapts to your needs. Use dairy or non-dairy milk. Use coconut cream instead of dairy cream if you want a dairy-free filling. Use your favorite jam flavor. Keep the look simple or decorate more.
- It is budget-friendly. No expensive ingredients or tools are needed. You can make a cake that looks like a bakery treat at home.
- It suits many occasions. Birthdays, picnics, family dinners, office celebrations, or a weekend treat. The flavor profile is friendly to both kids and adults.
- It is great for make-ahead steps. You can bake the cake layers a day in advance. You can whip the cream just before serving. You can assemble the cake a few hours before the party and keep it cold.
- It slices cleanly and serves well. The cream sets gently in the fridge, so slices hold their shape. The jam stays in place and adds color.
- It invites creativity. You can add a ring of chocolate shards, a dust of cocoa, and strawberry halves on top. You can pipe extra cream swirls if you want. You can add playful touches while keeping the cake calm and neat.
In short, this Jellycat Birthday Cake is easy, pretty, and reliable. It delivers comfort, sweetness, and celebration with very little stress.
How to Make Jellycat Birthday Cake
You will make the cake in three parts: cake layers, filling, and assembly. Here is the simple flow and the tools that help you move fast.
Tools you will need:
- Two 20 cm (8-inch) or 23 cm (9-inch) round cake pans
- Parchment paper
- Large mixing bowls
- Hand mixer or stand mixer (whisk attachment)
- Fine-mesh sieve for sifting dry ingredients
- Rubber spatula
- Measuring scale (for grams)
- Cooling rack
- Small saucepan (to melt butter with milk)
- Offset spatula or a butter knife (for spreading)
- Serrated knife (optional, for leveling)
- Piping bag (optional, for neat cream edges)
- Small sieve (for dusting cocoa)
- Long lighter or matches for the candle
Timing overview:
- Prep: about 20–25 minutes
- Baking: 20–28 minutes (depends on pan size and oven)
- Cooling: 45–60 minutes
- Assembly and decorating: 15–20 minutes
Basic process:
- Prepare your pans and oven. Heat the oven to 175°C (350°F). Grease two round pans with a little butter or oil. Line the bottoms with parchment circles. Lightly flour the sides. This helps the layers release cleanly and bake evenly.
- Make the cake batter. Whisk the dry ingredients (flour, baking powder, salt). In another bowl, beat the eggs and sugar until thick, pale, and foamy. This gives lift and a soft crumb. Add the oil and vanilla. Mix briefly. Warm the milk and butter together in a small saucepan until the butter melts and the mixture is warm but not boiling. Slowly add the dry ingredients to the egg-sugar mixture in two additions, alternating with the warm milk-butter mixture. Fold gently with a spatula just until smooth. Do not overmix. Overmixing makes the cake dense.
- Bake the layers. Divide the batter evenly between the two pans. Smooth the tops. Bake on the center rack. Start checking at 20 minutes for 9-inch pans, or at 22–25 minutes for 8-inch pans. The cakes are done when a toothpick comes out clean or with a few moist crumbs, and the tops spring back when touched.
- Cool the layers. Let the cakes rest in the pans for 10 minutes. Run a knife around the edges. Turn each layer out onto a cooling rack. Peel off the parchment. Let them cool fully, about 45–60 minutes. Cool layers are key because warm cake will melt the whipped cream.
- Make the whipped cream filling. The cream must be very cold. Chill your bowl and beaters for 10 minutes in the fridge if you can. Beat the cold cream, powdered sugar, and vanilla until medium peaks form. Do not overwhip. If you go too far and it looks grainy, add a spoon of fresh cream and fold gently to smooth it.
- Assemble the cake. Place one cake layer on a serving plate. Spread a thin ring of whipped cream around the edge to create a barrier. This helps keep the jam from leaking out. Spread the strawberry jam inside the ring, from the center to just shy of the edges. Add a generous layer of whipped cream on top of the jam and gently spread. Place the second cake layer on top, flat side down. Press very gently to level.
- Decorate. Cover the top with more whipped cream, spreading it smooth or swirling with the back of a spoon. Lightly dust cocoa powder on top using a small sieve. Arrange the halved fresh strawberries. Sprinkle the roughly chopped dark chocolate over the top or around the edges. Add the birthday candle in the center or slightly off-center for a playful look. Chill the cake for at least 30 minutes before slicing so the cream sets.
Helpful notes:
- The mix of butter and oil makes a cake that is both flavorful (butter) and moist (oil).
- Warm milk helps the batter blend smoothly and bake with a fine crumb.
- The whipped cream is not too sweet, so the jam can shine.
- The cocoa powder adds a light, chocolate scent and a pretty contrast.
Once you learn this flow, you can make this Jellycat Birthday Cake with calm and joy every time.
Ingredients for Jellycat Birthday Cake
225 g all-purpose flour, 1 1/2 teaspoons baking powder, 1/2 teaspoon salt, 3 large eggs (room temperature), 225 g granulated sugar, 85 g unsalted butter, 190 g milk (dairy or non-dairy), 2 tablespoons oil, 1 1/2 teaspoons vanilla extract, 300 g whipping cream or heavy cream (cold), 30 g powdered sugar, 1 teaspoon vanilla extract, 1-2 teaspoons cocoa powder, 4 tablespoons strawberry jam (store-bought or homemade), 2-3 fresh strawberries (halved), 1 birthday candle (with white and red stripes if possible), 20 g dark chocolate (roughly chopped)
Note: Soften the butter before starting, or melt it gently with the milk as described. Keep the cream very cold for best whipping.
Directions for Making Jellycat Birthday Cake
Cake Layers, Filling, Assemble and decorate the cake
How to Serve Jellycat Birthday Cake
This cake shines as a birthday centerpiece. Keep the look clean and cute. Here are simple ways to serve it well.
- Chill before slicing. Place the assembled cake in the fridge for 30–60 minutes. This helps the cream set. Slices will look neat and hold their shape.
- Use a hot, dry knife. Dip a long knife in hot water, then wipe it dry. Slice straight down. Clean the blade between cuts. You will get clean layers with clear stripes of cream and jam.
- Portion sizes. For a standard celebration, cut 10–12 slices from an 8-inch cake. For smaller portions or a bigger crowd, cut thinner wedges, 14–16 slices.
- Plate presentation. Set each slice on a small plate. Add a few extra strawberry slices or a sprinkle of the chopped dark chocolate on the side. Dust a little cocoa on the plate for a café-style look.
- Pairing drinks:
- Hot drinks: black tea, Earl Grey, green tea, or chamomile. Coffee, cappuccino, or latte also pair well. The cake is not too sweet, so it balances with coffee.
- Cold drinks: cold milk (dairy or non-dairy), sparkling water with lemon, lemonade, or iced tea. For adults, a light Prosecco or Champagne feels festive.
- Fruity sips: strawberry milk or a simple strawberry spritz (sparkling water, a spoon of jam stirred in, ice, and a lemon slice).
- Side additions:
- Fresh berries: extra strawberries, raspberries, or sliced kiwi add color and freshness.
- Light sauces: a quick strawberry coulis (blend a spoon of jam with a splash of water and strain), or a thin drizzle of melted dark chocolate. Use a light hand to keep the cake’s delicate flavor.
- Crunch elements: a few extra chocolate shards on each plate.
- Serving at a party:
- Carry the cake out with the candle lit for a big moment. If children are present, keep matches and flame away from them.
- After the song, remove the candle and any candle wax if present before slicing.
- Keep the cake on a stand or a plate with a slight lip so it is easy to move in and out of the fridge between slices.
- Temperature tips:
- Serve slightly chilled for neat slices.
- If you prefer a softer bite, let slices sit at room temperature for 10–15 minutes before eating. The cream softens, and the flavors open up.
This simple serving plan makes your Jellycat Birthday Cake look and taste its best with very little effort.
How to Store Jellycat Birthday Cake
This cake contains fresh cream, so keep it cold. Here is how to store it safely and keep the texture nice.
Short-term storage (same day or next day):
- Keep the assembled cake covered in the fridge. A cake dome, a large bowl turned upside down, or a deep cake carrier works well. Avoid plastic wrap touching the cream surface.
- It tastes best on the day you make it but stays lovely for up to 2 days.
Leftover slices:
- Place slices in an airtight container. Add a small sheet of parchment between slices so they do not stick.
- Store in the fridge for up to 3 days. The sponge stays moist, and the cream holds. The strawberries may soften after day 2.
Freezing:
- Best practice: freeze the cake layers only (unfilled and fully cooled). Wrap each layer tightly in plastic wrap, then foil. Label and freeze for up to 2 months. Thaw in the fridge overnight before filling and decorating.
- Can you freeze the fully assembled cake with cream? It is not ideal. Whipped cream can change texture after thawing and may weep. If you must freeze leftover slices, wrap each slice, freeze up to 1 month, and thaw in the fridge. Expect a slightly softer cream after thawing.
- Do not freeze the fresh strawberries on top if you want the same look after thawing. They can turn mushy.
Transporting:
- Keep the cake cold before travel. Use a cake carrier with an ice pack under the base (wrapped in a towel).
- Drive carefully, keep it level, and avoid direct sun. Add the candle after you arrive.
Reheating:
- No reheating is needed for cake with cream. If you prefer a softer texture, let a chilled slice sit at room temperature for 10–15 minutes before serving.
With these steps, your Jellycat Birthday Cake will stay fresh, safe, and delicious.
Tips for Making the Best Jellycat Birthday Cake
- Measure by weight. Use a kitchen scale for flour, sugar, milk, butter, and cream. Accurate weights make a light, even crumb.
- Bring eggs to room temperature. This helps the batter emulsify and trap air. If you forgot, place eggs in warm (not hot) water for 10 minutes.
- Sift dry ingredients. Sift the flour, baking powder, and salt. This removes lumps and distributes the leavening evenly.
- Do not overmix. Once you add flour to the wet mix, fold gently just until combined. Overmixing develops gluten and can make the cake tough or dense.
- Use the warm milk-butter method. Warm milk melts the butter and helps the batter blend smoothly. Add it gradually so you do not deflate the egg-sugar foam.
- Bake evenly. Divide batter evenly between the pans. Use a scale to split the batter (weigh the bowl before and after). Rotate the pans only if your oven has hot spots and only after the batter is set (about two-thirds of the way through baking).
- Test for doneness. A toothpick should come out clean or with moist crumbs. The edges pull slightly from the pan, and the top springs back when touched.
- Cool completely. Cream melts on warm cake. Let layers cool fully on a rack before adding cream and jam.
- Whip cream cold. Chill the bowl and beaters for best volume. Beat to medium peaks: when you lift the whisk, the tip should hold a gentle peak that slightly curls. Overwhipped cream looks grainy; fix it by folding in a tablespoon of fresh cream.
- Build a jam barrier. Pipe or spread a ring of cream around the bottom layer’s edge. Spread jam inside the ring. This keeps the jam from leaking out and staining the cream.
- Keep edges clean. If you want crisp sides, use an acetate cake collar when assembling. Chill, then remove for smooth edges.
- Use cocoa lightly. Dust cocoa with a small sieve. A little goes a long way. You can create patterns using a paper stencil for a playful finish.
- Chocolate texture. Roughly chop the dark chocolate so you get a mix of small and medium bits. Sprinkle right before serving for the best crunch.
- Strawberry freshness. Pat the fresh strawberry halves dry with a paper towel. This prevents juice from bleeding onto the cream.
- Slice like a pro. Chill the cake 30–60 minutes. Use a hot, dry knife and clean it between cuts.
- Flavor lift. Add a tiny pinch of salt to the whipped cream to enhance flavor. Do not overdo it.
- Make-ahead plan. Bake cake layers a day ahead, wrap, and refrigerate. Whip cream and assemble on the day you serve.
- Room conditions. On a warm day, keep the cake in the fridge until the last minute. If serving outdoors, set the cake over a tray of ice packs under the stand to keep it cool.
- Salvage tips:
- Too dry? Brush layers with a light simple syrup (equal parts sugar and water, cooled) before adding cream.
- Sunken middle? Level the top with a serrated knife and fill with cream. No one will know.
- Overbrowned top? Flip the layer so the flat bottom becomes the top.
These small moves make a big difference and help your Jellycat Birthday Cake turn out perfect.
Variations for Jellycat Birthday Cake
This recipe is flexible. You can adapt flavors and finishes while keeping the same core method.
- Jam swaps:
- Use raspberry jam for a tangier bite.
- Try apricot or peach jam for a sunny flavor.
- For a mixed-berry twist, use a berry blend jam. Keep the same amount so the layers stay stable.
- Fruit options:
- Garnish with raspberries, blueberries, or sliced kiwi.
- For a tropical look, add thin mango slices. Pat them dry first.
- Chocolate finish:
- Use milk chocolate or white chocolate shavings if you prefer a sweeter note.
- Melt the dark chocolate and drizzle thin lines across the top instead of sprinkling chunks.
- Citrus lift:
- Add 1 teaspoon of lemon or orange zest to the batter. Citrus pairs well with strawberry and cream.
- Cocoa dust patterns:
- Place a paper heart or star cut-out on the cake and dust cocoa over it. Lift it off to reveal a cute shape.
- Extra-stable cream:
- For hotter days, add 1–2 tablespoons of mascarpone to the cream before whipping for more stability. Keep the rest the same.
- Dairy-free version:
- Use non-dairy milk (as the ingredient list allows) and a plant-based whipping cream (coconut or oat-based). Chill plant cream very well. The rest of the steps are the same.
- Gluten-free version:
- Replace flour with a 1:1 gluten-free baking blend that contains xanthan gum. Sift well. Note that texture may be slightly different but still soft.
- Egg-free version (more advanced):
- Replace each egg with 1 tablespoon ground flaxseed mixed with 3 tablespoons water (per egg), rested 10 minutes. The cake will be denser but still tasty. Whip cream as usual or use a dairy-free whipped topping if also avoiding eggs and dairy.
- Funfetti look:
- Fold 2–3 tablespoons of rainbow sprinkles into the batter right before pouring into pans. Bake as usual. This adds a cheerful confetti crumb.
- Sheet cake or cupcakes:
- Bake the batter in a 23×33 cm (9×13 inch) pan for a sheet cake (adjust bake time; start checking at 22 minutes).
- For cupcakes, fill liners two-thirds full and bake 16–20 minutes. Top with whipped cream and a small dot of jam.
- More chocolate:
- Add mini chocolate chips to the whipped cream layer (a small handful). Keep them small so slicing remains clean.
- Jellycat-inspired styling:
- Keep the top smooth and add two strawberry halves near the top edge like “ears,” a dust of cocoa like soft “fur,” and a small cluster of chocolate shards like “whiskers.” It stays cute and simple.
These variations keep the cake playful and personal while staying true to the recipe’s easy spirit.
Frequently Asked Questions About Jellycat Birthday Cake
- Can I substitute dairy milk with non-dairy milk? Yes. The ingredient list already allows dairy or non-dairy milk. Use an unsweetened plant milk like almond, oat, or soy. Warm it gently with the butter; if you are avoiding dairy completely, use a plant-based butter or melt coconut oil instead. The texture will still be soft. The flavor stays neutral.
- Can I make the cake layers ahead of time? Yes. Bake the layers, cool fully, wrap each layer tightly, and store in the fridge for up to 2 days or in the freezer for up to 2 months. Thaw frozen layers in the fridge overnight. Add the whipped cream and jam on the day you plan to serve.
- How do I keep the jam from leaking out? Build a whipped cream barrier. Pipe or spread a ring of cream around the edge of the bottom layer. Spread the jam inside the ring. This keeps the jam from reaching the sides and prevents it from seeping into the cream as you slice.
- Why is my cake dense or gummy? Common reasons: too much flour, overmixing, or underbaking. Measure flour by weight (225 g). Fold the batter gently and stop mixing as soon as the flour disappears. Bake until a toothpick comes out clean or with a few crumbs. Cool fully before assembling.
- My whipped cream turned grainy. How can I fix it? You likely overwhipped. Add 1–2 tablespoons of fresh cold cream and fold gently with a spatula. This usually smooths it out. Next time, stop at medium peaks. Cold equipment helps avoid overwhipping.
- Can I reduce the sugar? You can reduce the granulated sugar in the cake to 200 g if you prefer a less sweet sponge. The texture will remain good. In the whipped cream, you can lower the powdered sugar to 20 g. The cake will be lightly sweet and the jam will still provide a nice pop.
- What pan size should I use? Two 20 cm (8-inch) round pans are ideal for taller layers. Two 23 cm (9-inch) pans also work and will bake a bit faster with slightly thinner layers. Start checking a few minutes earlier with larger pans.
- Can I assemble the cake the day before? Yes. Assemble, decorate, and chill overnight. Cover the cake with a dome or large bowl so it does not dry out. Add the fresh strawberries on top the day you serve for the freshest look. The flavor is lovely on day two.
- How do I transport the cake safely? Chill the cake well first. Place it in a cake carrier. For longer trips, put an ice pack under the base (wrapped in a towel). Keep it level and out of direct sun. Add the candle after you arrive.
- Can I skip the cocoa powder? Yes. The cocoa powder adds a light color contrast and a hint of chocolate scent, but it is optional. You can decorate with only strawberries and chocolate shards if you prefer a simpler look.
- Can kids help make this cake? Yes. Kids can sift the flour, whisk the dry ingredients, spread jam, and place strawberry halves. Adults should handle the oven, hot milk-butter mixture, and the candle.
- How do I prevent strawberry juice from bleeding onto the cream? Dry the strawberry halves with a paper towel before placing them on the cake. Add them close to serving time. If using very ripe berries, place them on top of the cocoa-dusted surface, which also helps hide any small juices.
Enjoy making and sharing your Jellycat Birthday Cake. It is simple to bake, joyful to decorate, and delightful to eat. It brings a soft, happy touch to any birthday or celebration.
Print
Jellycat Birthday Cake
- Total Time: 60 minutes
- Yield: 10-12 slices 1x
- Diet: Vegetarian
Description
A soft, light, and joyful birthday cake filled with sweet strawberry jam and whipped cream, finished with chocolate and fresh strawberries.
Ingredients
Scale
- 225 g all-purpose flour
- 1 1/2 teaspoons baking powder
- 1/2 teaspoon salt
- 3 large eggs (room temperature)
- 225 g granulated sugar
- 85 g unsalted butter
- 190 g milk (dairy or non-dairy)
- 2 tablespoons oil
- 1 1/2 teaspoons vanilla extract
- 300 g whipping cream or heavy cream (cold)
- 30 g powdered sugar
- 1 teaspoon vanilla extract
- 1–2 teaspoons cocoa powder
- 4 tablespoons strawberry jam (store-bought or homemade)
- 2–3 fresh strawberries (halved)
- 1 birthday candle (with white and red stripes if possible)
- 20 g dark chocolate (roughly chopped)
Instructions
- Preheat the oven to 175°C (350°F) and prepare two round cake pans with butter and parchment.
- Whisk together flour, baking powder, and salt in a bowl.
- In another bowl, beat eggs and sugar until thick and foamy. Mix in oil and vanilla.
- Warm the milk and butter in a saucepan until melted and combined, then add to the egg mixture.
- Combine the dry ingredients with the wet ingredients, folding gently until just combined.
- Divide the batter evenly between the prepared pans and bake for 20-28 minutes until toothpick comes out clean.
- Let the cakes cool in the pans for 10 minutes, then transfer to a cooling rack to cool completely.
- For the filling, beat the cold cream with powdered sugar and vanilla until medium peaks form.
- Assemble the cake by spreading a ring of whipped cream on the first layer, followed by strawberry jam, more whipped cream, and then the second cake layer.
- Decorate with more whipped cream, dust with cocoa powder, and top with strawberries and dark chocolate before chilling.
Notes
Chill the cake for at least 30 minutes before slicing for neat pieces. Keep leftovers stored in the fridge.
- Prep Time: 25 minutes
- Cook Time: 28 minutes
- Category: Dessert
- Method: Baking
- Cuisine: American
Nutrition
- Serving Size: 1 slice
- Calories: 350
- Sugar: 25g
- Sodium: 200mg
- Fat: 15g
- Saturated Fat: 8g
- Unsaturated Fat: 7g
- Trans Fat: 0g
- Carbohydrates: 45g
- Fiber: 2g
- Protein: 5g
- Cholesterol: 70mg
Keywords: birthday cake, dessert, celebration, jellycat cake