Follow Me On Social Media!
Oreo No-Bake Cheesecake Cups
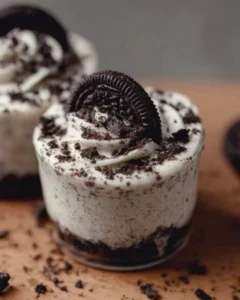
Oreo No-Bake Cheesecake Cups are a delightful, easy treat that combines the richness of cheesecake with the beloved crunch of Oreo cookies. I still remember the first time I made these for a family gathering—the way everyone’s eyes lit up when they took their first taste was priceless. These individual dessert cups are perfect for any occasion, whether it’s a summertime barbecue or a cozy winter evening in. They’re simple to whip up and require no oven, making them an ideal choice for anyone who wants something delicious without the hassle.
What Makes This Recipe Special
Why should you make Oreo No-Bake Cheesecake Cups? For starters, they’re a crowd-pleaser. With just a handful of ingredients, you can create a sophisticated dessert that looks and tastes impressive. The creamy cheesecake filling perfectly balances the crunch of the Oreos, delivering a delightful texture in every bite. Plus, they’re quick to make—ideal for busy days or last-minute gatherings.
"These are now a staple at our family reunions! Everyone loves them, and they take no time to prepare." – A happy home cook
Whether hosting a holiday feast or just wanting to treat yourself after a long day, these cheesecake cups deserve a place on your table.
Your Easy Cooking Guide
Making these Oreo No-Bake Cheesecake Cups is a breeze! You’ll start by preparing a quick crust with crushed Oreos, followed by the creamy filling that comes together seamlessly. After combining the ingredients, you’ll layer them in individual cups and allow them to chill until ready to serve. It’s that simple!
What you’ll need
To create these delicious cups, gather the following ingredients:
- 1 (8 oz) block of cream cheese, softened
- 1 (8 oz) tub of Cool Whip or whipped topping
- 2/3 cup powdered sugar
- 1 teaspoon vanilla extract
- 24-26 Oreo cookies (more as desired)
Feel free to choose any favorite whipped topping if you want a lighter twist.
Step-by-Step Directions
- Crush the Oreos: Place the Oreos in a zip-lock bag, seal, and crush them using a rolling pin or sturdy spoon until you have fine crumbs.
- Prepare the dishes: Spoon 1 1/2 to 2 tablespoons of the crushed Oreos into the bottom of six small dessert dishes. Set aside.
- Make the filling: In a mixing bowl, whip the softened cream cheese and powdered sugar together until creamy and smooth. Add in the vanilla and mix until combined.
- Fold in Cool Whip: Gently fold in the Cool Whip, ensuring it’s fully incorporated into the cream cheese mixture.
- Add Oreos: Fold in the remaining crushed Oreos for an extra crunch.
- Layer the filling: Divide the cheesecake filling evenly across the prepared dessert dishes. Ensure to gently press it down onto the crust.
- Chill: Refrigerate for about 1 hour or until you are ready to serve.
- Serve and Enjoy: Top with extra whipped cream and crushed Oreos before serving for that extra special touch.
Best Way to Serve
To elevate your serving game, consider adding a drizzle of chocolate sauce or a sprinkle of mini chocolate chips on top. Pair these cheesecake cups with fresh strawberries or a scoop of vanilla ice cream for a wonderful contrast. They also make a fun addition to dessert trays at parties.
Keeping Oreo No-Bake Cheesecake Cups Fresh Longer
These cheesecake cups can easily be stored in the fridge for up to three days. Make sure to cover them with plastic wrap or a lid to retain their freshness. If you want to make them ahead of time, you can prepare them up to two days in advance. Just wait to add the whipped cream topping until you’re ready to serve.
Expert Advice
- Softening Cream Cheese: For the best texture, make sure your cream cheese is fully softened. Leave it out at room temperature for about 30 minutes before mixing.
- Customize Layers: Feel free to layer in different flavors. Try adding peanut butter or melted chocolate to the cheesecake filling for a unique twist.
- Avoid Overmixing: When folding in the Cool Whip, be gentle. You want to maintain that light, airy texture in the filling.
Creative twists
There are countless ways to enjoy these cheesecake cups. For a minty fresh version, add crushed mint Oreo cookies and a splash of peppermint extract to the filling. If you’re looking for a fruitier twist, swap out some crushed Oreos for fresh raspberries or strawberries.
Helpful FAQs
How long does it take to prepare this recipe?
The preparation takes approximately 15-20 minutes, followed by one hour of chilling time.
Can I use low-fat cream cheese?
Yes, you can substitute low-fat cream cheese for a lighter option, but it may slightly alter the creaminess.
What’s the best way to store leftovers?
Store leftovers in an airtight container in the refrigerator. They should stay fresh for up to three days. Avoid freezing, as it may alter the consistency.
With an easy recipe like this, your dessert table will never be the same again! Enjoy your delightful Oreo No-Bake Cheesecake Cups, and watch them disappear as quickly as you make them.
Print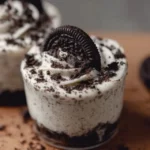
Oreo No-Bake Cheesecake Cups
- Total Time: 60 minutes
- Yield: 6 servings 1x
- Diet: Vegetarian
Description
Delightful and easy Oreo No-Bake Cheesecake Cups that combine the richness of cheesecake with the beloved crunch of Oreo cookies.
Ingredients
Scale
- 1 (8 oz) block of cream cheese, softened
- 1 (8 oz) tub of Cool Whip or whipped topping
- 2/3 cup powdered sugar
- 1 teaspoon vanilla extract
- 24–26 Oreo cookies (more as desired)
Instructions
- Crush the Oreos: Place the Oreos in a zip-lock bag, seal, and crush them using a rolling pin or sturdy spoon until you have fine crumbs.
- Prepare the dishes: Spoon 1 1/2 to 2 tablespoons of the crushed Oreos into the bottom of six small dessert dishes. Set aside.
- Make the filling: In a mixing bowl, whip the softened cream cheese and powdered sugar together until creamy and smooth. Add in the vanilla and mix until combined.
- Fold in Cool Whip: Gently fold in the Cool Whip, ensuring it’s fully incorporated into the cream cheese mixture.
- Add Oreos: Fold in the remaining crushed Oreos for an extra crunch.
- Layer the filling: Divide the cheesecake filling evenly across the prepared dessert dishes. Ensure to gently press it down onto the crust.
- Chill: Refrigerate for about 60 minutes or until you are ready to serve.
- Serve and Enjoy: Top with extra whipped cream and crushed Oreos before serving for that extra special touch.
Notes
These cheesecake cups can be stored in the fridge for up to three days. Add whipped cream before serving for best results.
- Prep Time: 20 minutes
- Cook Time: 0 minutes
- Category: Dessert
- Method: No-Bake
- Cuisine: American
Nutrition
- Serving Size: 1 cup
- Calories: 250
- Sugar: 16g
- Sodium: 150mg
- Fat: 15g
- Saturated Fat: 8g
- Unsaturated Fat: 6g
- Trans Fat: 0g
- Carbohydrates: 29g
- Fiber: 1g
- Protein: 3g
- Cholesterol: 30mg
Keywords: cheesecake, no-bake, dessert, Oreo, easy recipe, quick dessert